![]()
![]()
![]()
![]()
![]()
![]()
![]()
![]()
![]()
![]()
![]()
![]()
![]()
![]()
![]()
![]()
![]()
|
|
|
|
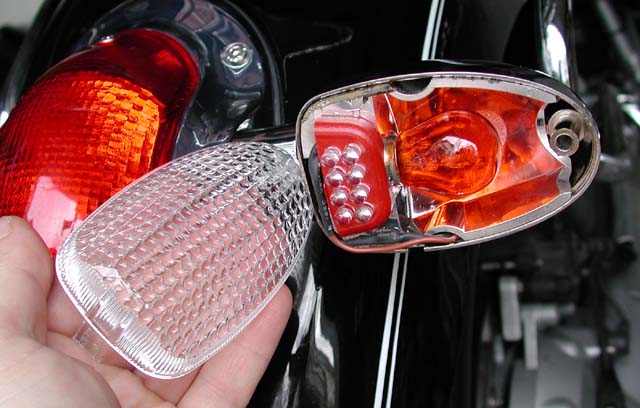
Shedding some more light on the subjectI like the idea of adding lighting to the motorcycle in an effort to make it more conspicuous. The taillight of the bike is a bit on the small side, so I added some Run-N-Lites Lite-Buddys with the optional Stop Light Alert feature. This is a pair of LED pods that sit inside the rear turn signals and serve as additional full time red rear running lights.
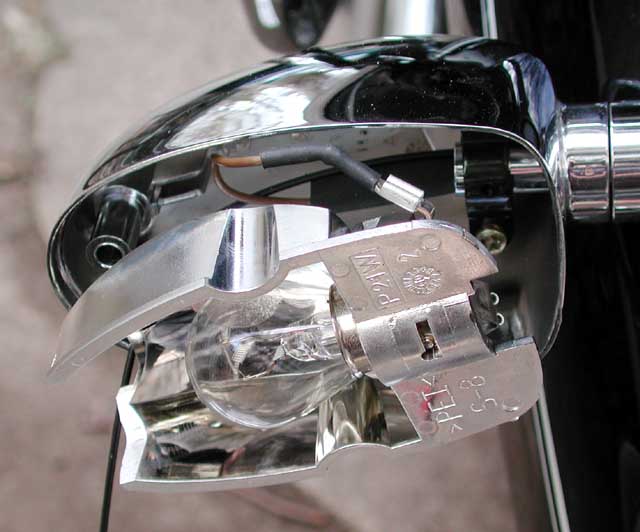
The installation is pretty straightforward. You remove the turn signal lens and fish a thin black wire through the stalk, back into the taillight section.
The LED pods come equipped with adhesive backing and piggy back electrical connectors. You simply disconnect the old spade connector, plug in the new connector and then plug the old spade onto the new one. There is no need to cut any wires, but a terminal crimper tool (or a pair of pliers) is necessary to connect one of the spades to the end of the wire that gets fished through the stalk)
The LED pod fits nicely and you can route the wire up or down, depending on your mood.
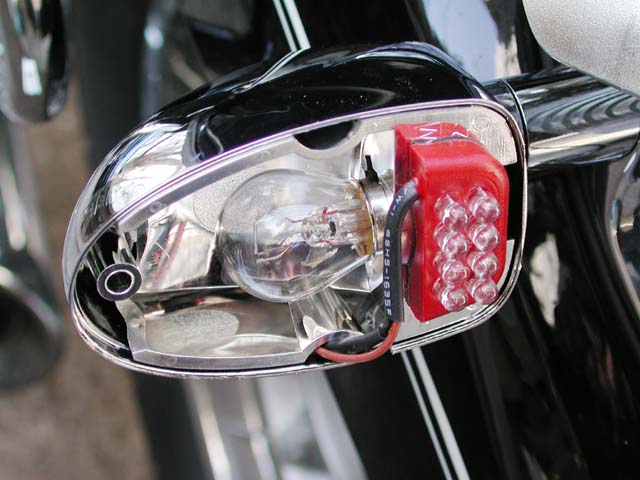
Although the LEDs are clear when they are turned off, they are bright red when powered up. They do show through the amber lenses, and display as bright red (my digital camera is very sensitive to the high infrared output of the LEDs so they show up as white in the photos here, but are red to the naked eye). I also connected the Stop Light Alert option, which hooks into the brake signal terminals in the taillight (it connects via a small module that lives in the taillight housing). This causes the LED's to flash a few times when the brakes are applied, then they revert to a steady on state. The StopAlert stops flashing a little sooner than my Kisan TailBlazer, so it makes a very visible combination.
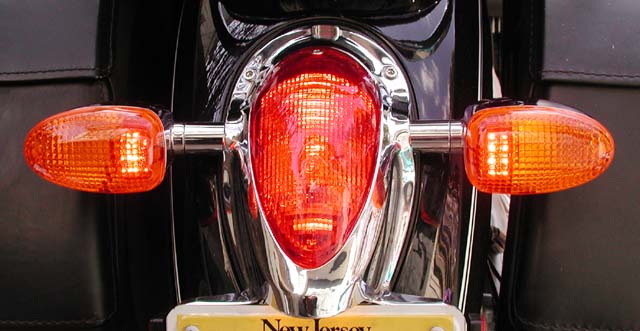
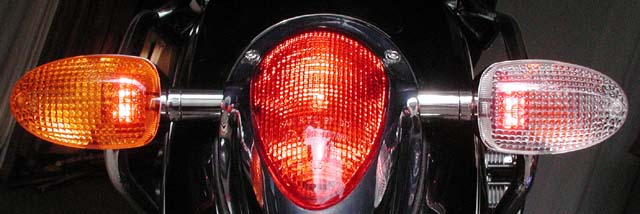
I decided that even though the red shows through the amber lenses, I wanted to see how it would look with the clear lenses (normally found on the Phoenix edition of the bike).
The photo above shows the normal configuration: Amber lens with a clear bulb.
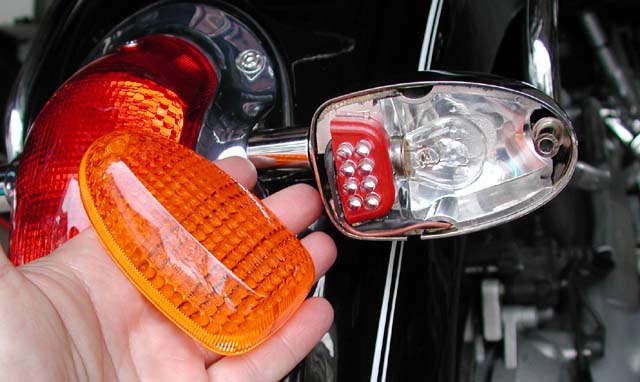
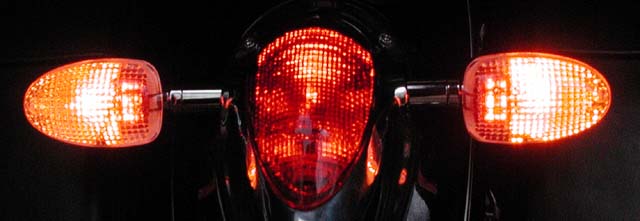
This photos shows the new setup: Clear lens with amber bulb.
The photo above shows one of each configuration (amber lens on the left)... just so show the difference with just the LiteBuddies lit.
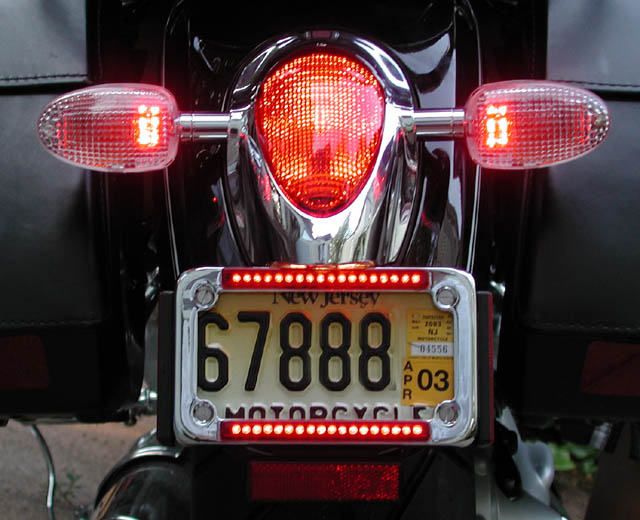
The photo above shows one of each configuration with the 4 way flashers on (so both the turn signals and LEDs are lit)
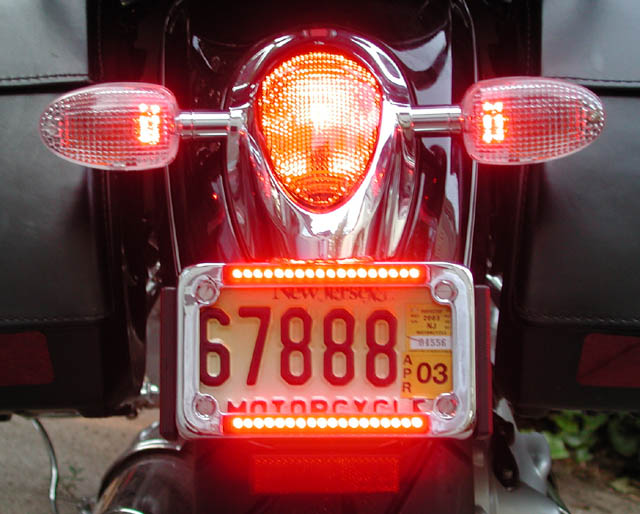
Finally, here is the final clear lens configuration, all lit up. I like the way the new lenses look, the LEDs shine through quite brightly. I'm looking around to see if I can find brighter amber bulbs to make the directional signals more noticeable. Update: New Taillight assembly and BackOff frame.In an effort to increase conspicuity even more, two months later I purchased a BackOFF license plate frame from CycleGadgets. The frame has two rows of LEDs, dual intensity so they get brighter when the brake is applied. The photos below demonstrate the difference between the normal running lights and the brake.
When I got the BackOff frame, I was a little concerned because the old style R1200C taillight assembly (the one visible in the Run-n-Lites photos at the top of this page) is a single piece cast piece comprised of the bezel and the license plate holder. I thought I was going to have to file out a bit of the top of the BackOFF frame to fit it onto the plate because of the curvature of the area where the bezel and plate come together. However, when I was about to do the machining, I noticed that my taillight bezel had cracked (for the third time), at the top left bolt (where it always did). This time, I was in luck... BMW has finally updated the taillight assembly. The new assembly is in several pieces, detaching the license plate frame from the taillight bezel. When I simply elongated the holes in the plastic plate holder. I gained the extra 1/8" or so necessary to mount the BackOFF frame without any modifications to the frame itself. Notice that the new bezel no longer has exposed bolts. Hopefully this will keep the bezel from cracking again. So now I'm very pleased with the lighting at the rear of the bike. Lots of bright lights, and blinky things going on! If you have comments, please visit the Guestbook. Copyright © 2002 by Zenreich Systems. All
rights reserved.
|
|
All text and photographs copyright © 1999 - 2017 Zenreich Systems. All rights reserved. |