![]()
![]()
![]()
![]()
![]()
![]()
![]()
![]()
![]()
![]()
![]()
![]()
![]()
![]()
![]()
![]()
![]()
|
|
|
|
RiderLight Helmet BrakelightFor a few years I've been interested in the idea of a helmet mounted brake light for increased rider conspicuity.
I've seen a few products that serve this purpose, and have ridden with a friend who wears another model. None of the units I saw impressed me enough to acquire one until I came across the RiderLight. I bought my unit from CycleGadgets.com. During my first ride with the unit, the young lady who was riding her bike behind me said that the helmet light was very visible. When the brake is applied, a radio signal gets sent to the receiver. The unit lights steadily for 5 seconds, then begins to flash twice a second for as long as the brake is applied. If you forget to turn it off, the unit powers itself down if no signal has been received for 3 hours. The receiving range of the unit seems to be 30 feet or more. Also, all the transmitters and receivers use the same frequency. So, if you're riding with a group of motorcycles and there are multiple RiderLights in use, any brake light activation will light any helmet lights within range. Thinking about this... it's probably a good thing for group conspicuity. Click the small photos for larger images I'll try to add some photos of the RiderLight during dusk and nighttime use.
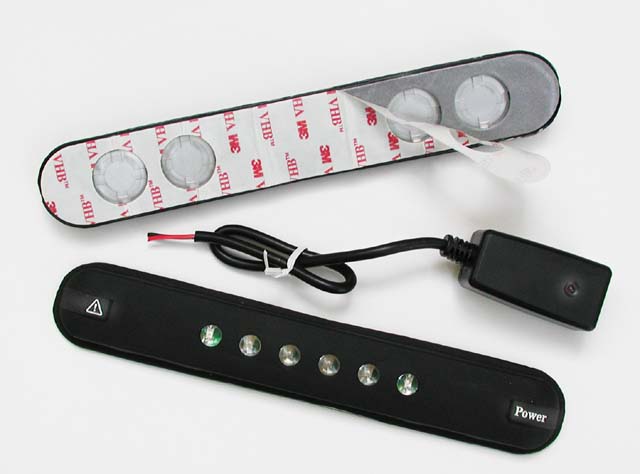
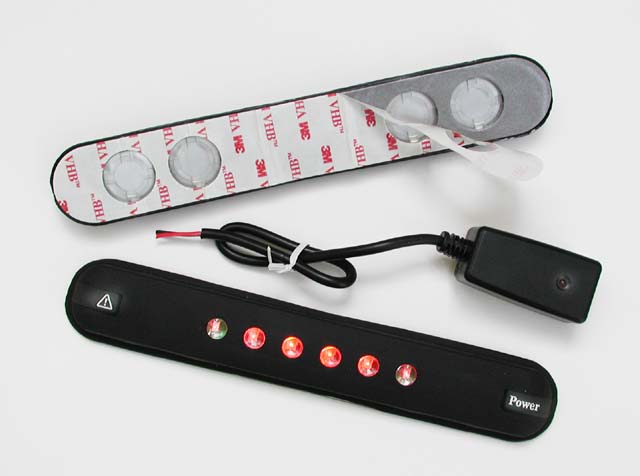
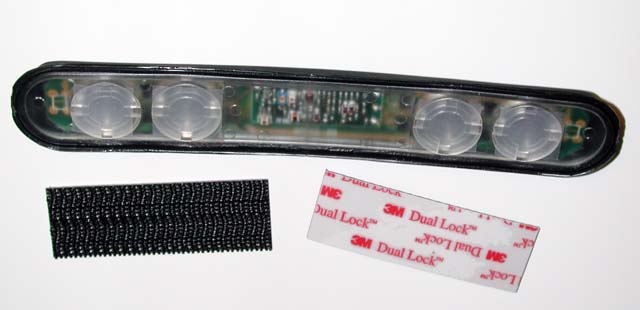
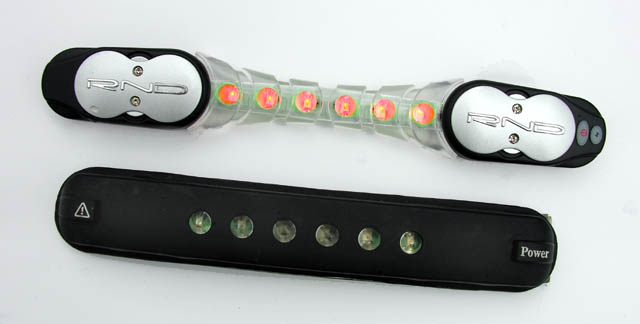
The kit consists of a radio transmitter and a LED receiver. There are two versions of the transmitter. One uses a pigtail wired "black box" (shown) that attaches to the brake light wires of the motorcycle. The other style transmitter is built into the base of a taillight bulb, and fits many motorcycles, (any bike that uses a single 1157-style dual-element Brake/Tail light bulb) so there would be no wiring to do at all. Because I use a taillight modulator with a special bulb, I opted for the "black box" transmitter. I bought two receivers, one for my helmet and one to move between my passengers' helmets. The photos above show the front and back of the receiver, with the lights off and on. The supplied mounting tape (3m VHB) has cutouts for the plastic battery covers. According to the manufacturer, batteries should last about 6 months of normal use.
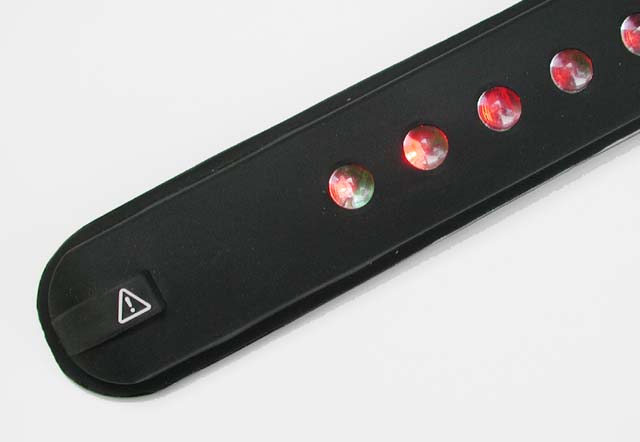
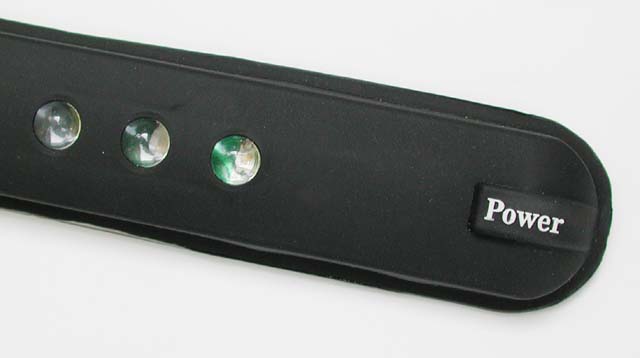
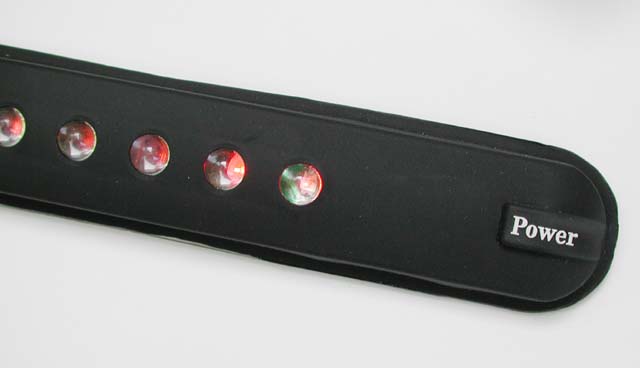
There are two raised push switches... one for power, one for emergency flasher. When you press the power switch, the lights flash once indicating that the unit is powered on. A second press turns the unit off... and the lights flash twice to indicate that it's powering down. If the unit is turned on, pressing the flasher button causes the lights to flash about twice per second. Pressing the power button turns the flasher (and the unit) off.
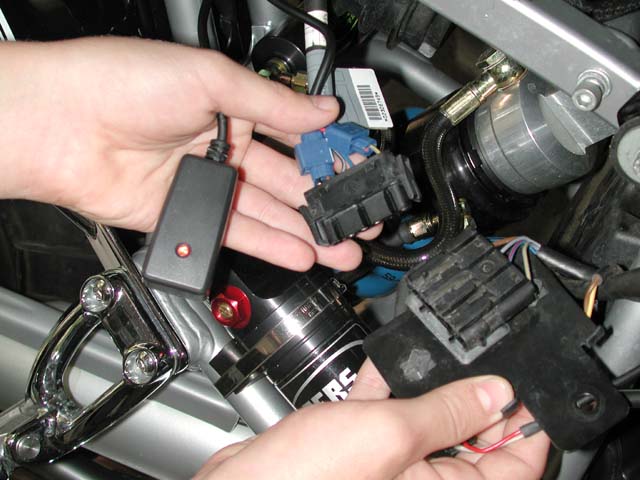
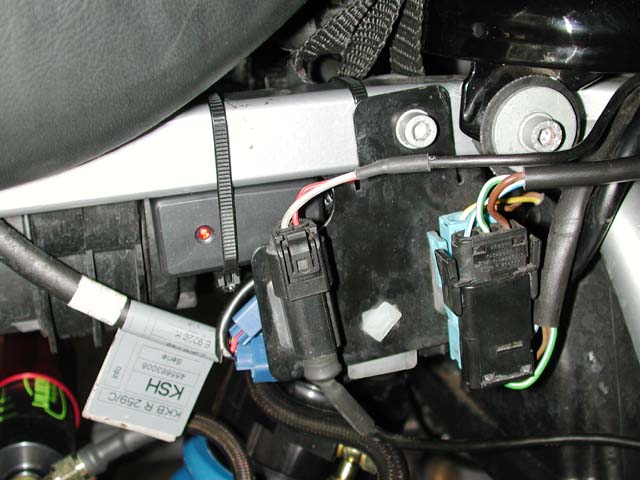
On the BMW R1200C, there is a wiring connector under the painted side plate on the throttle side of the bike. To get to the connector, lift the seat, remove the chrome side plate, to expose the painted side plate screws. Connect the black wire on the transmitter to the brown ground wire of the harness with the supplied connector clip. Connect the red wire of the transmitter to the brake light wire (I forget the color, but it's at the end of the connector, furthest away from the brown ground wire) as shown in the photo above. I used a zip-tie to fasten the transmitter to the frame. There is a red LED on the transmitter which lights when power is applied, so it's easy to test the connection.
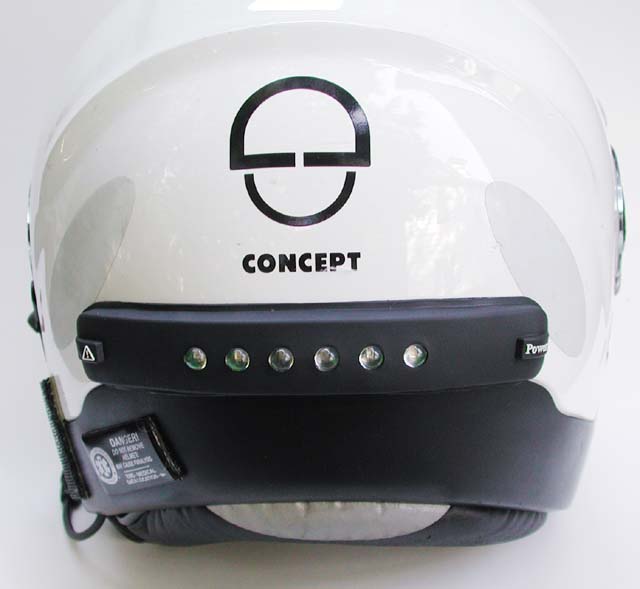
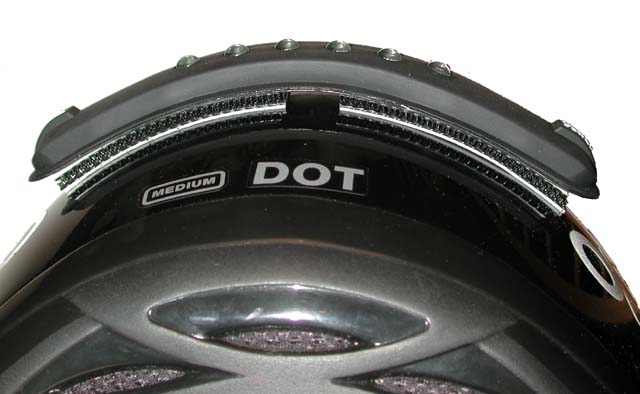
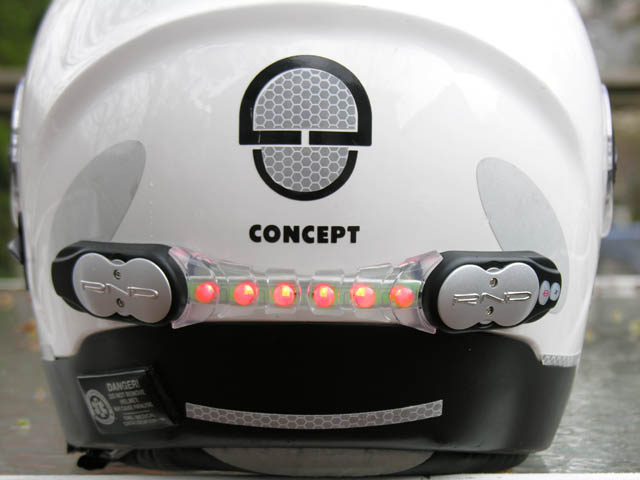
Before fastening the receiver to my helmet, I took some masking tape and temporarily positioned the receiver on the helmet. I then sat upright on the bike with the RiderLight in flasher mode. I had my wife and a friend look at the helmet from a distance to see where the best visibility would be. Because LEDs are pretty directional, the position on the helmet makes a difference, and it's likely that you'll need to mount it lower on the helmet than you might originally think (it depends quite a bit on your riding position, but I figured that simulating being stopped at a traffic light would be best for me). The masking tape makes it easy to move the light up and down during this testing. Once the optimum position was determined, I peeled back the adhesive backing and fastened one of the receivers to my helmet. I decided to take a different approach with the second receiver. Instead of using the supplied adhesive, I replaced it with some 3M Dual Lock tape strips. This way I could mount the Dual Lock to the receiver and a mating pair to each of my three passenger helmets. Of course I could ordered only one receiver and simply used this mounting technique for all helmets... moving the receiver to the passenger helmet as needed. However I really wanted one for my helmet to be there all the time, and just turn it off when I ride with a passenger... so two receivers was a good compromise.
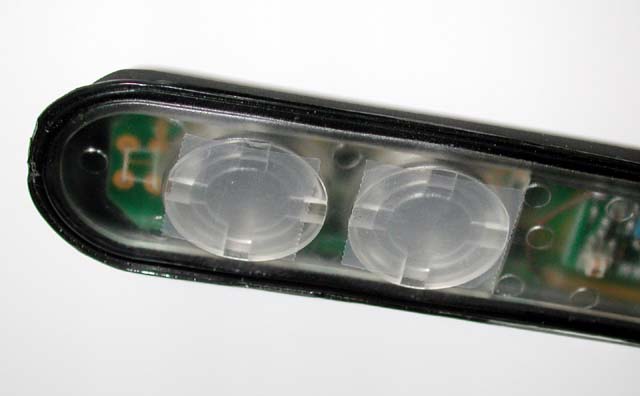
Because I didn't want the Dual Lock to stick to the soft plastic battery covers, I put some Scotch Tape over the covers (this was much easier than trying to cut holes in the adhesive). When it comes time to change batteries, the tape should come off easily and not distort the battery covers.
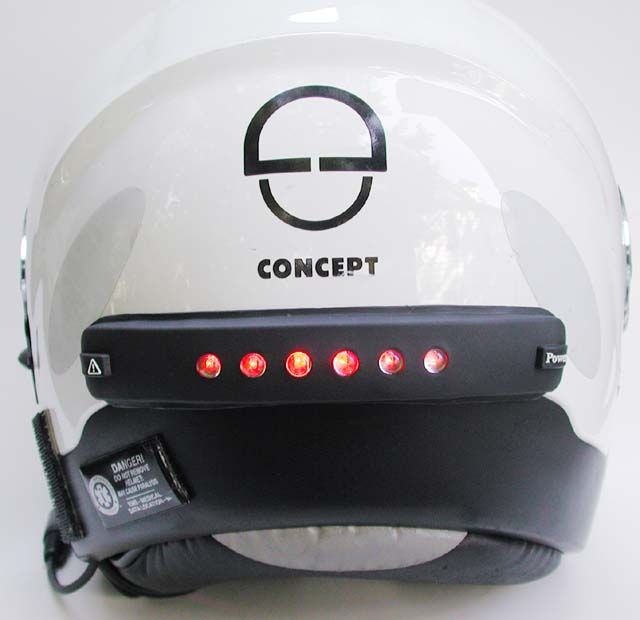
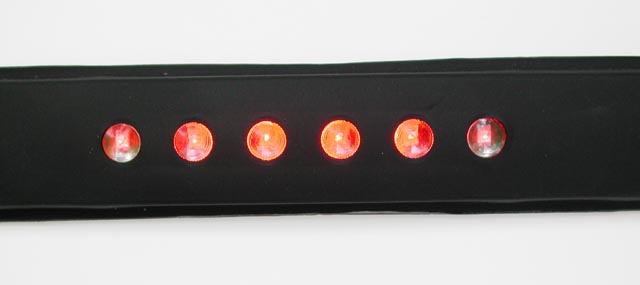
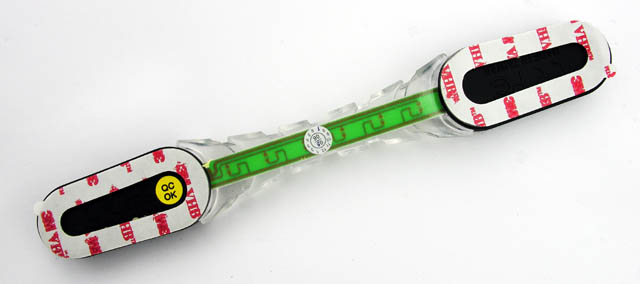
After the Dual Lock was fastened to the receiver, I mounted it's mating piece onto the receiver (to make sure they mate properly), then pulled off the release paper and pressed the unit onto one of my passenger helmets. This is the procedure I'm using for each of the helmets. New Helmet LightUpdate April 2006 After having used the RiderLight shown above for three years, I've found that I rather like having the helmet mounted brakelight. A couple of things could use improvement. It would be nice not to have to remove the adhesive to change batteries, and the unit could be more flexible to better fit the curves of the helmet. Recently I started seeing ads for a competitor to RiderLight that seems to have addressed these issues. I don't have the brand name handy, but I got mine from RideSafer.com, for a very reasonable price of $59 (for the transmitter and receiver.) I'm guessing that these new units are made by the same manufacturer, as the transmitters are the virtually identical for both brands, you can mix and match units. As you can see from the photos, the new unit is more flexible than the previous design. The LEDs stand off from the helmet by about 1/4", and the adhesive area is curved to fit the helmet very nicely.
I really like the new design, the LEDs now cause a glow along the clear plastic strip, and onto the helmet. You can change batteries by using a small screwdriver. Of course, since no good deed goes unpunished, the new design does take one step back. On the RiderLight, the power and flasher switches are large and on opposite sides of the unit. On the new light they are small switches, very close together on one side of the unit. The old design made it easy to use the switches, even while wearing the helmet and having gloved hands. It's possible with the new unit, but not nearly as easy, so it's best to make sure you turn it on before you put on your helmet. If you have comments, please visit the Guestbook. Copyright © 2003 by Zenreich Systems. All
rights reserved.
|
|
All text and photographs copyright © 1999 - 2017 Zenreich Systems. All rights reserved. |