![]()
![]()
![]()
![]()
![]()
![]()
![]()
![]()
![]()
![]()
![]()
![]()
![]()
|
|
|
|
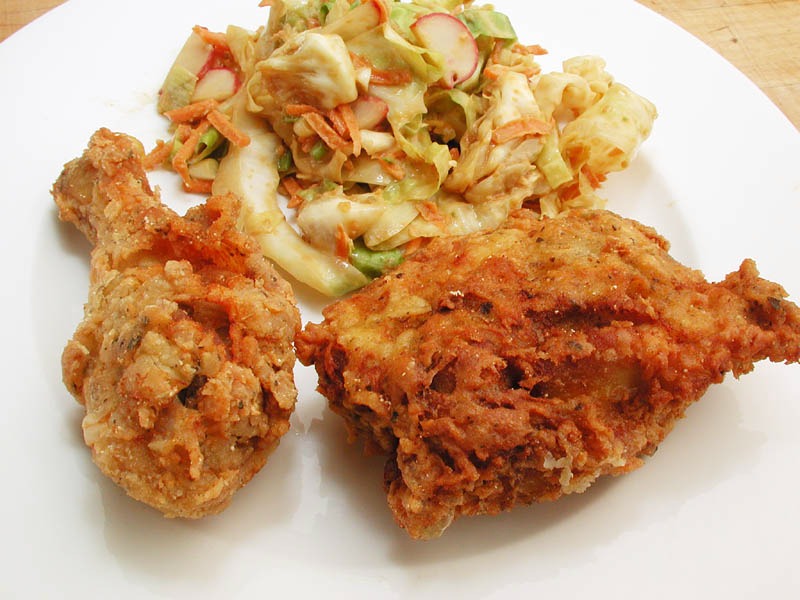
Crispy Crunchy Fried Chicken
We were watching a show on the Food Television Network where they demonstrated making fried chicken. We haven't made this dish for several years, and thought it was time to give it another try. Lauren did all the cooking here, and these are her notes. Click on the small photos for larger images. The ingredients
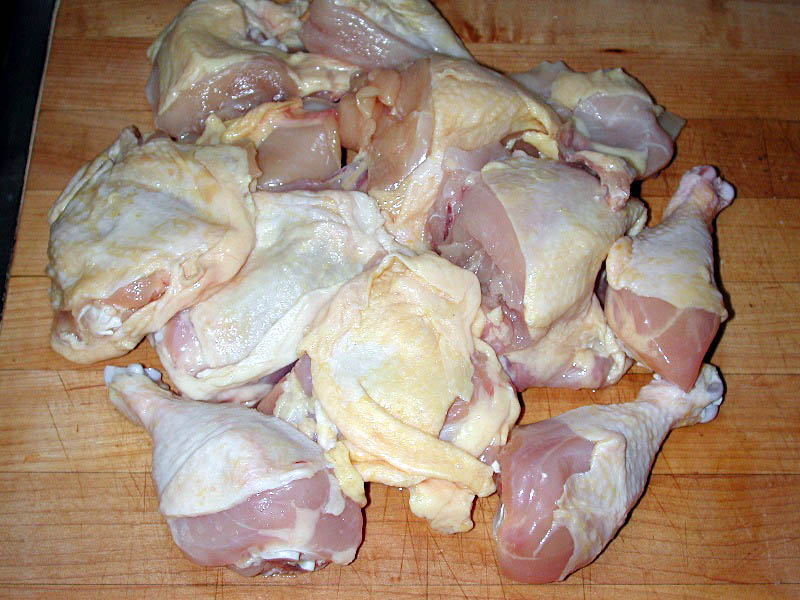
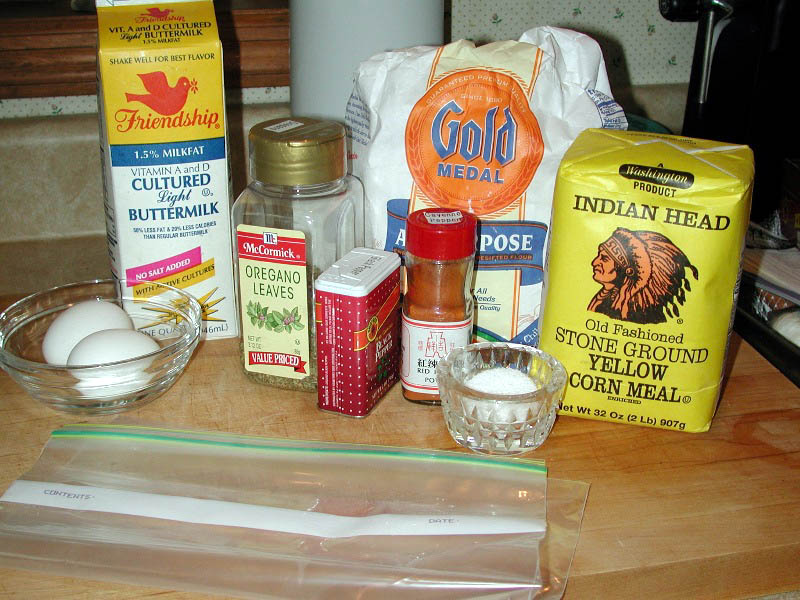
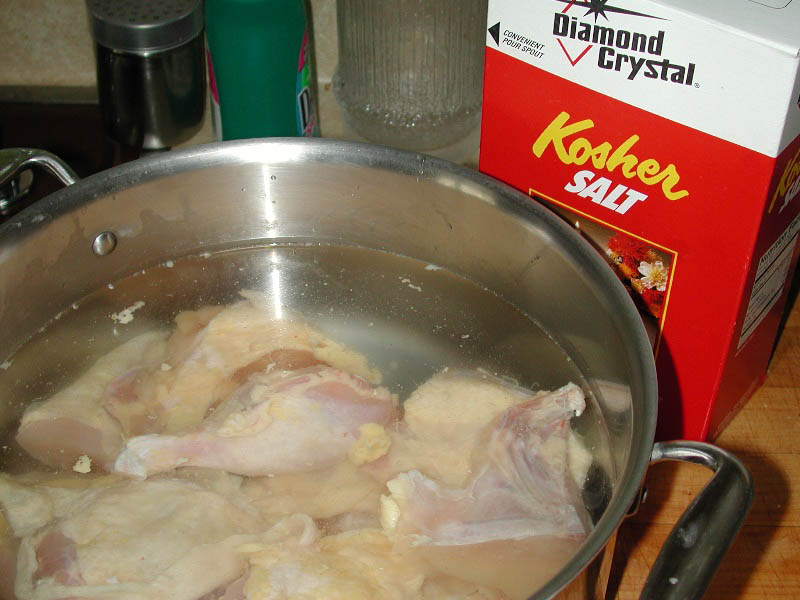
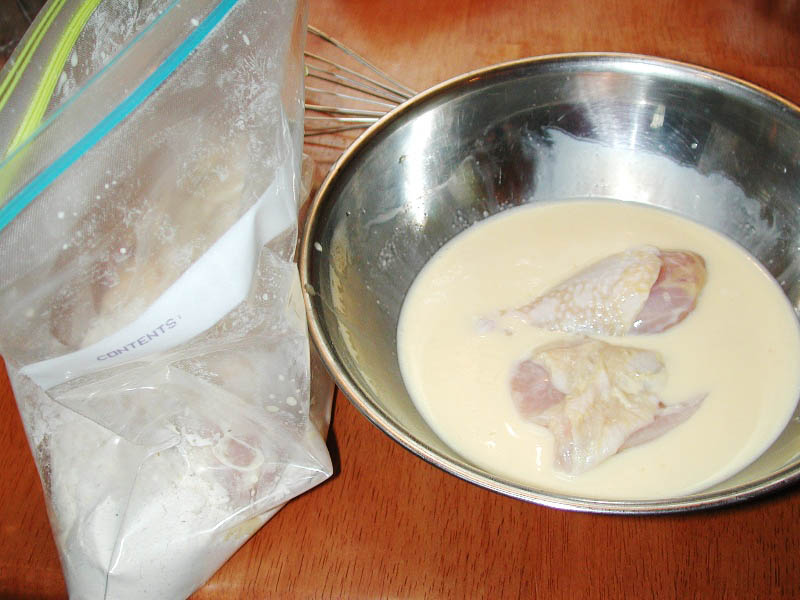
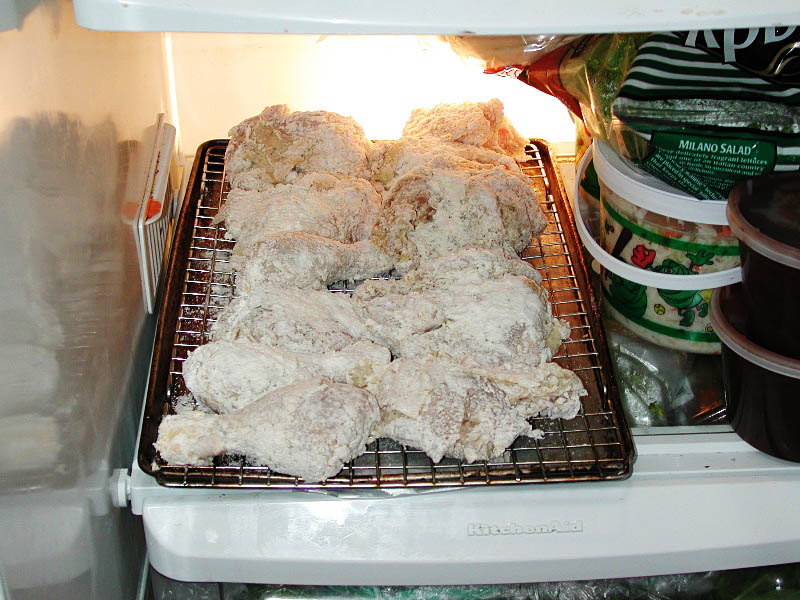
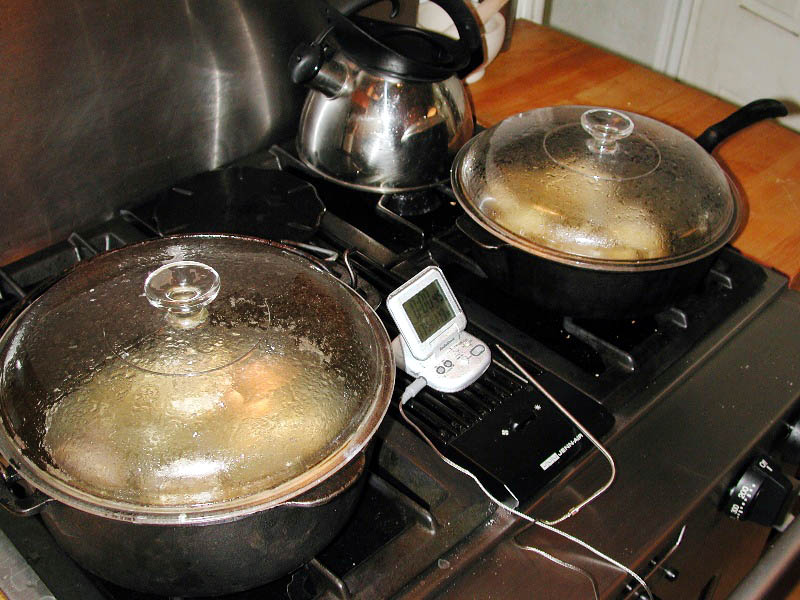
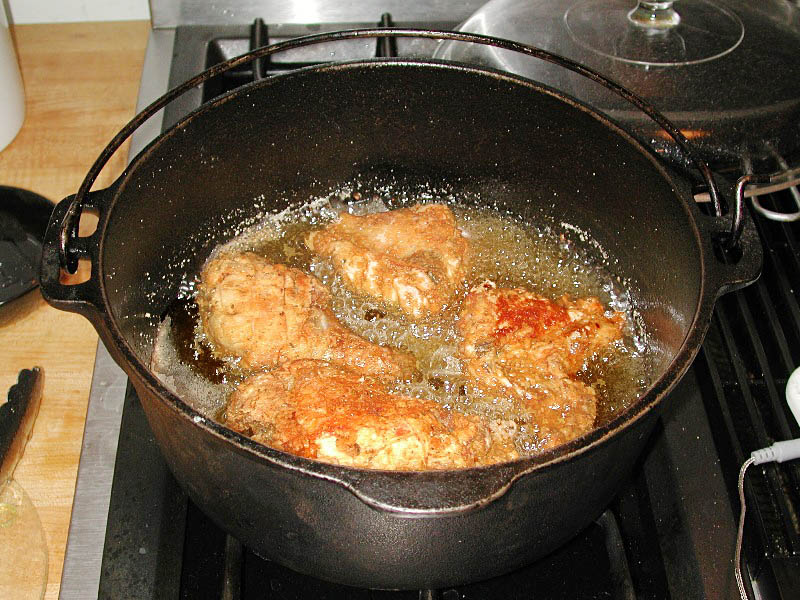
First we want to brine the chicken so it will be juicy on the inside and crispy on the outside. In a large bowl or pot, dissolve 1/2 cup coarse salt in 3 quarts of water. Rinse chicken pieces, and add to bowl. Cover, and refrigerate for 2 hours. Remove chicken pieces, and rinse under cool water. Clear space in the refrigerator to accommodate a wire cooling rack. Mix together the flour, cornmeal, and seasonings, and place in a large resealable plastic bag. Shake. In a medium bowl, whisk the eggs, then whisk in the buttermilk. Dip half the chicken pieces in the buttermilk mixture, then place in the plastic bag. Shake, and lay out on a wire rack. Repeat for remaining pieces. Put the rack on a jelly-roll pan or cookie sheet, and place in the refrigerator for at least 1 hour, but preferably 2, to set. Pour peanut oil to a depth of 3/4 inch in a large iron Dutch oven. Actually, I used my two cast iron pans and cooked the chicken in the two pans simultaneously. Cast iron works very well for frying. It’s a heavy pan and the heat is very evenly disbursed. Place over medium-high heat.
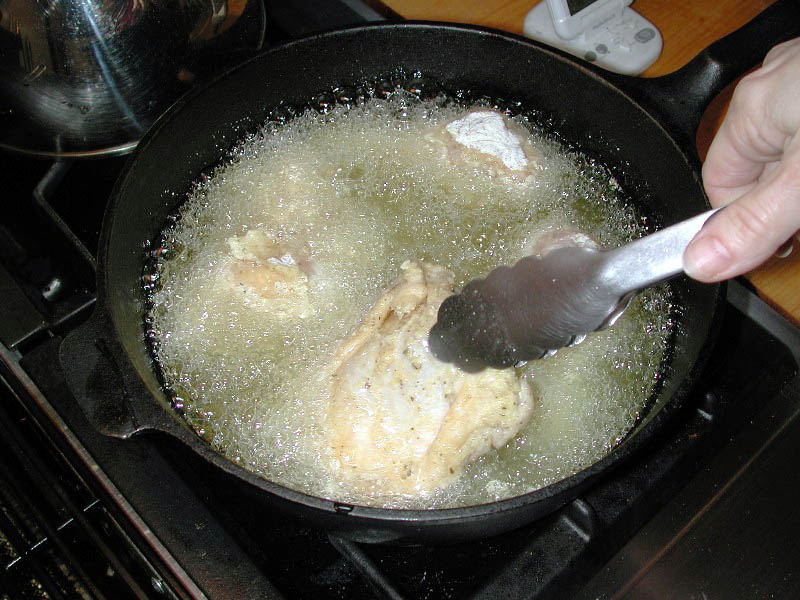
When oil reaches 365° (if you don’t have a thermometer, simply wait until the oil starts to smoke—very hot oil is fine for this recipe), arrange chicken pieces in the pan, skin-side down, and cover pan. After 5 minutes, remove the cover. Adjust heat level, if necessary, so oil bubbles at a moderate pace—not too rapidly and not too slowly. (Medium to medium-high heat is best, depending on the heat conductivity of your pan.) Rearrange pieces if some are browning more quickly than others. After 5 more minutes, turn the pieces over. You’ll know the chicken is ready to be turned when it moves easily. If it fights back, it’s not ready. You only want to turn the chicken once. Cook uncovered for 8 to 10 more minutes or until done. Meanwhile, thoroughly wash and dry the wire rack while the chicken is cooking.
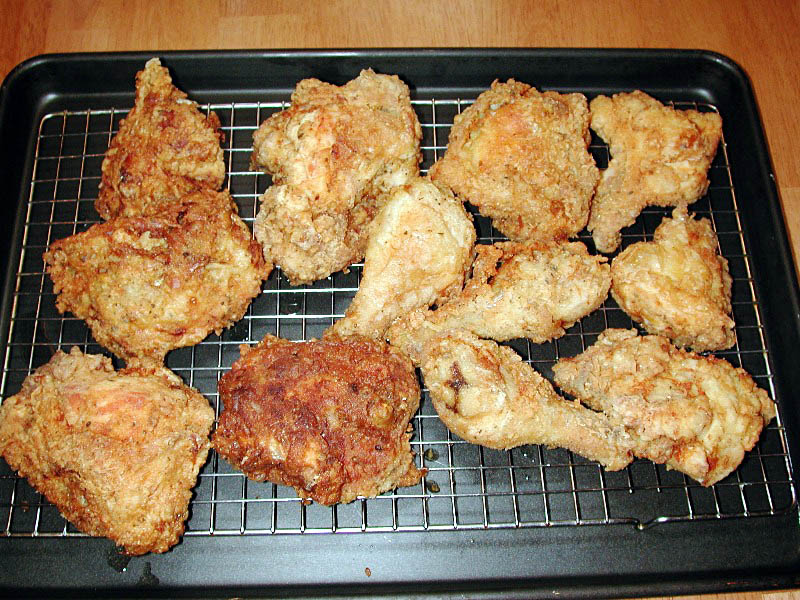
Remove the fried chicken to the cleaned wire rack set over a jelly-roll pan or cookie sheet. Let drain for 5 minutes, and serve. This has got to be the best fried chicken we’ve ever made, and is well worth the effort and refrigerator space.
Copyright © 2000 by Zenreich Systems. All rights reserved. |
|
All text and photographs copyright © 1999 - 2017 Zenreich Systems. All rights reserved. |